
How to Install PostgreSQL on Windows
PostgreSQL is a robust open-source RDBMS (relational database management system) that is used in various applications, big data operations, and mission-critical enterprise solutions. Once you determine to Install PostgreSQL in Windows, it is important to perform the proper steps so that the installation is successful. Although the task of how to install PostgreSQL on Windows seems quite simple, some users may run into problems without being attentive, so it is very important to follow each step.
First and foremost, it is vital to highlight the site to which one can download the necessary tool-PgSQL. The prime step that must be performed in the process to install PostgreSQL on Windows is the acquisition of the official enterpriseDB installer. Shortly after you have install PostgreSQL on Windows, you can move on with the installation procedure. The procedure wizards guide you in many important decisions such as the location of the installation, the components that will be installed, and the superuser password for the database are the main ones most of the time when you install PostgreSQL on Windows.
One of the essential elements to install PostgreSQL on Windows is the configuration of PostgreSQL to your own server. You must select if you want to go with the prebuilt defaults or you want to edit some settings like the installation path and the data directory. Once the process is done, you must be sure that the PostgreSQL is already working fine by the use of logging in and checking the version number.
In rare situations, the users have to change the settings for remote access or do some other configuration tasks after they have install PostgreSQL on Windows. Configuring the files postgresql.conf and pg_hba.conf may be required to allow access from other machines. After all such changes, the service restart is advisable to update the new settings.
In conclusion, having the knowledge of how to install PostgreSQL on Windows and knowing the steps required could help you in running smoothly your PostgreSQL setup. Whether or not you intend to use PostgreSQL for development or production, following these steps will give you a clear knowledge of managing and maintaining your PostgreSQL databases.
Step 1: Download the PostgreSQL Installer
Windows users can make use of the EnterpriseDB PostgreSQL official installer when trying to install PostgreSQL. However, it is the best method for this post. The installer consists of all the binaries and configuration files that Postgres requires, in addition to tools such as the web-based Postgres database pgAdmin 4 and Stack Builder (for the extra installation of tools and extensions for Postgres).
1.Visit the official PostgreSQL download page:
- Open your web browser and go to PostgreSQL Downloads.From the list of operating systems, choose the Windows option.
2.Pick the required edition:
- Select the version of PostgreSQL you want to install.
- The latest stable version should be the first one to look for, but with the exception that you require a specific version for compatibility reasons.
- Click on the “Download the installer” link, then the EnterpriseDB website will be launched.
3.Download the Installer:
- From the EnterpriseDB page, choose the right release for your particular model (32-bit or 64-bit) and then click on its link. For systems, the 64-bit version is to be selected.
- Download the installer (.exe file) for Windows.
Step 2: Run the Installer
After you have downloaded, you can start the installation process.
1.Go to the installer file:
- You will find the downloaded installer file in your Downloads folder, or the location that you specified.
- Double-click the installer file to start the installation.
2.PostgreSQL Setup Wizard:
- The PostgreSQL Setup Wizard will pop up.
- You should click on Next for the installation process to be continued.
3.Select the Installation Directory:
- The program will ask you for the path where the software will be installed, your choice.
- As the case is with the system’s default installation, PostgreSQL will be installed in C:\Program Files\PostgreSQL\.
- You can change this location if you want to, but the default location will be applicable for most of the users.
4.Select Components:
- The installer will ask you which components you want to be installed.
- The default selections are:
- PostgreSQL Server: The core PostgreSQL database server.
- pgAdmin 4: A graphical tool for managing your PostgreSQL databases.
- Stack Builder: A tool for adding additional PostgreSQL tools and extensions.
- You can leave the default settings untouched and click Next.
5.Data Directory:
- PostgreSQL will request you on which location to store its data which is your databases.
- Initially, the installer will set the data directory to C:\Program Files\PostgreSQL\\data.
- You may leave it as it is if you want, or if necessary, you may select a different directory.
6.Superuser Password Setting:
- The following step to setting the superuser password which is the default administrative account in PostgreSQL is to enter the password for the postgres user.
- Enter a very strong password (make sure you remember it) and then click on the Next button.
7.Port Selection:
- PostgreSQL Port 5432 is the default port.
- If this port is busy with other applications, you may still choose any of the other ports.
- As you are probably aware, the default port is most often adequate, so just leave it where it is and select Next as the next step.
8.Locale Settings:
- The installer will ask for the locale setting.
- The most common, typical setting is good enough if you do not have any preferences, but if you do, you can change your locale here.
- Hit the Next button when you are done with the previous steps.
Step 3: Install PostgreSQL
1.Begin the installation:
- After reviewing and setting all the necessary parameters, hit Next to begin the installation process.
- The installer will copy the required files, create a database system, and set up the PostgreSQL service on your personal computer.
- This period will vary but usually is completed within minutes.
2.Ensure That The Installation is Complete:
- After completing the installation, the installer will pop up a summary window.
- Click the Finish button to quit the setup wizard.
Step 4: Start PostgreSQL and Verify the Installation
1.Start the PostgreSQL Service:
- The PostgreSQL installer makes PostgreSQL a Windows service, which starts your machine when you turn it on.
- To see whether PostgreSQL is running, open Windows Services by typing services.msc in the Windows Start and pressing Enter.
- Be sure that PostgreSQL can be found on the list. The service should be running by itself, but if it doesn’t, you can start it up by right-clicking on it and choosing Start.
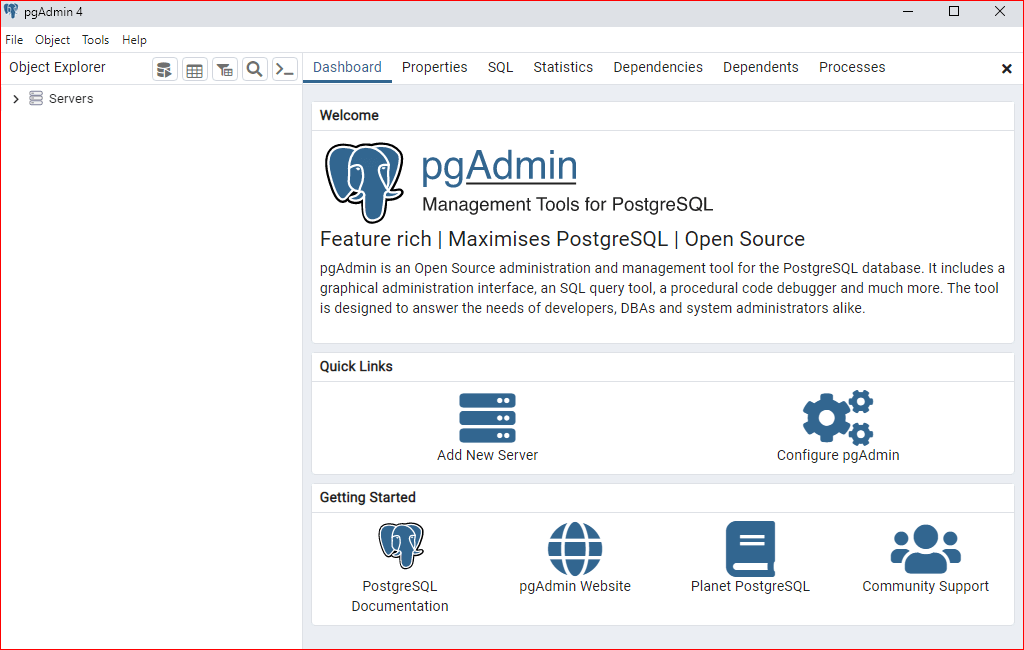
2.How to Connect to PostgreSQL With pgAdmin 4:
- By setting up the system, you are also able to manage your PostgreSQL databases through pgAdmin 4, the graphical user interface for PostgreSQL.
- Click on the Start button and look up pgAdmin 4 to open the same. Click on it.
- Upon the first start, you would have to confirm the superuser password that you used to install during the process.
3.Verify Installation Using Command Line:
- By alternatively verifying the installation through the Command Prompt or by running the following commands:
- Open a Command Prompt window (type cmd in the Start menu search bar and hit Enter).
- To access the PostgreSQL command line tool, type the following command:
psql -U postgres
- When you are requested by the system to key in the password you previously set during the installation process, just do so.
- You must now be at the PostgreSQL command-line interface, from where fair SQL queries and act as administrator can be done.
- Verify PostgreSQL Version: To check the version of PostgreSQL installed, type the following command:
SELECT version();
- Through this, you will be able to see the version of PostgreSQL that is running.
Step 5: Set Up PostgreSQL for Remote Access (Optional)
PostgreSQL operates in such a way that no other device can communicate with it by default. If you are planning to offer remote access to your database, you have to update the configuration files.
1.Edit the postgresql.conf File:
- First, you will need to find where the postgresql.conf file resides. The file is usually accessible in the data folder of the PostgreSQL installation directory (e.g., C:\Program Files\PostgreSQL\\data\postgresql.conf).
- Then, open the postgresql.conf file in a text editor (e.g., Notepad), and look for the listen_addresses setting. This by default is set to localhost, hence only the local machine can connect to PostgreSQL.
- Replace the listen_addresses setting with:
listen_addresses = ‘*’
- The above method gives PostgreSQL the privilege to listen for incoming connections from any IP address.
2.Edit the pg_hba.conf File:
- First of all, you should edit the pg_hba.conf file to specify the specific hosts that are allowed to connect to your PostgreSQL server.
- Moreover, the file is also in the data directory of your PostgreSQL installation.
- To start with, you must edit the pg_hba.conf file in a text editor.
- Include the below line lastly, in the file to make possible the connection from each host:
host all all 0.0.0.0/0 md5
- So, everything is possible then all IP addresses can connect the PostgreSQL database by password authentication only.
3.Restarting PostgreSQL:
- Starting from here, everything of the changes made should be saved, and in order for the new settings to be affected, PostgreSQL should be restarted.
- Yes, it can be done in the Windows Service app or by executing the next command in Command Prompt:
net stop postgresql
net start postgresql
Step 6: Post-Installation Steps
1.Create a New Database (Optional):
- To create a new database, log in to PostgreSQL using the command line or pgAdmin, and run the following command:
CREATE DATABASE mydatabase;
2.Create a New User (Optional):
- To create a new user (role), you can use the following SQL command:
CREATE USER myuser WITH PASSWORD ‘mypassword’;
3.Grant Permissions (Optional):
- To grant privileges to the new user for a specific database, use:
GRANT ALL PRIVILEGES ON DATABASE mydatabase TO myuser;
Conclusion
You have finally clicked PostgreSQL on your Windows machine. Using the pgAdmin 4 graphical user interface you can manage your PostgreSQL databases or you can interact with it via the psql command-line tool. For development, production, or learning, these steps make your PostgreSQL installation up and functioning.
If you want remote access, you can change it via the PostgreSQL configuration files, and if you come across the installation issues, the pgAdmin tool and the command-line interface provides you with a troubleshooting database management feature.
Code happily!